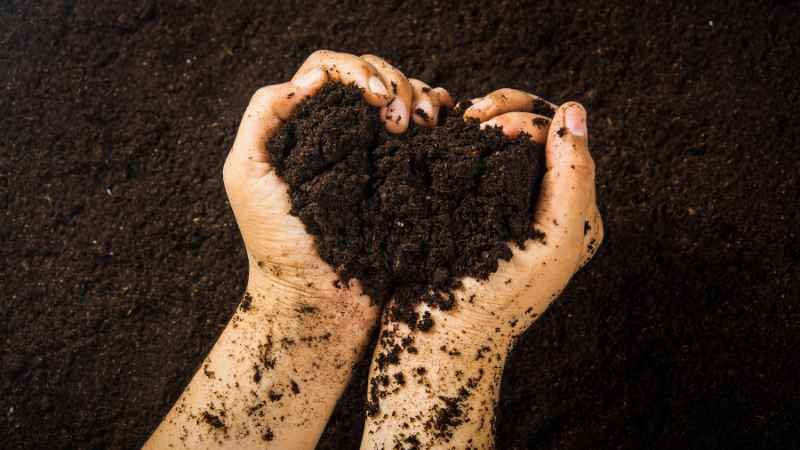
Sterilizing a large amount of soil is essential for various applications, including gardening, landscaping, and agricultural projects. This process helps eliminate pathogens, weed seeds, pests, and other unwanted organisms that can harm plants.
How To Sterilize A Large Amount Of Soil

Here are several effective methods to sterilize soil, along with detailed steps and additional information to help you choose the best approach for your needs.
1. Solarization
Materials Needed:
- Clear plastic sheeting
- Weights (stones, bricks, or soil staples)
- Garden tools (rake, hoe, or tiller)
Steps:
- Prepare the Soil: Break up the soil using garden tools to remove debris and large clumps. Ensure the soil is as level as possible to maximize contact with the plastic sheeting.
- Moisten the Soil: Water the soil thoroughly to a depth of at least 12 inches. Moist soil conducts heat better and helps in the sterilization process.
- Cover with Plastic Sheeting: Spread clear plastic sheeting over the moistened soil, making sure it is taut and tightly sealed around the edges with weights. Overlap the edges of the plastic by 12-18 inches to prevent heat escape.
- Solarize: Leave the plastic in place for 4-6 weeks during the hottest part of the year. The sun’s heat will penetrate the soil, raising temperatures to levels that kill most soil-borne pathogens and weed seeds. For best results, aim for at least six hours of direct sunlight per day.
Advantages:
- Environmentally friendly
- Simple and cost-effective
- Suitable for large areas
Disadvantages:
- Time-consuming
- Depends on weather conditions
2. Steam Sterilization
Materials Needed:
- Large container (metal drum, wheelbarrow, or concrete mixer)
- Steam source (boiler, large pot with a lid, or pressure cooker)
- Cover (metal lid or heavy cloth)
- Thermometer
Steps:
- Prepare the Soil: Place the soil in the container, breaking up any large clumps.
- Introduce Steam: Use a steam source to introduce steam into the soil. The soil should reach a temperature of at least 180°F (82°C) but not exceed 200°F (93°C) to avoid damaging soil structure.
- Maintain Temperature: Cover the container to retain heat and maintain the temperature for at least 30 minutes. Use a thermometer to monitor the temperature regularly.
- Cool and Use: Allow the soil to cool completely before using it for planting.
Advantages:
- Effective at killing pathogens, pests, and weed seeds
- Can be used in various weather conditions
Disadvantages:
- Requires specialized equipment
- Energy-intensive
3. Oven Sterilization (for small batches)
Materials Needed:
- Large baking pans
- Aluminum foil
- Oven
- Thermometer
Steps:
- Prepare the Soil: Spread soil in a baking pan to a depth of about 4 inches, breaking up any large clumps.
- Cover with Foil: Cover the pan tightly with aluminum foil to retain moisture and heat.
- Bake: Place the pan in an oven preheated to 180-200°F (82-93°C). Bake for 30 minutes. Monitor the temperature with a thermometer to ensure it does not exceed 200°F (93°C), as higher temperatures can release toxic fumes.
- Cool and Use: Allow the soil to cool before using it.
Advantages:
- Simple method for small amounts of soil
- Effective at killing pathogens and pests
Disadvantages:
- Not suitable for large quantities of soil
- Can produce unpleasant odors
4. Microwave Sterilization (for small batches)
Materials Needed:
- Microwave-safe containers
- Microwave
- Water
Steps:
- Prepare the Soil: Place soil in a microwave-safe container, filling it halfway. Add a small amount of water to create steam.
- Microwave: Microwave on high for about 90 seconds per kilogram of soil. The steam generated will help kill pathogens and pests.
- Cool and Use: Allow the soil to cool before using it.
Advantages:
- Quick and effective for small batches
- Convenient and easy to use
Disadvantages:
- Limited to small quantities of soil
- Potential uneven heating
5. Chemical Sterilization
Materials Needed:
- Soil fumigants (e.g., methyl bromide, dazomet, or formaldehyde)
- Protective gear (gloves, mask, and goggles)
- Plastic sheeting
Steps:
- Prepare the Soil: Loosen and moisten the soil to ensure even distribution of the fumigant.
- Apply Fumigant: Follow the manufacturer’s instructions for applying the fumigant. Use protective gear to avoid exposure.
- Cover and Seal: Cover the treated area with plastic sheeting to contain the fumigant and enhance its effectiveness. Seal the edges tightly.
- Ventilate: After the required exposure time (usually a few days to a week), remove the plastic sheeting and allow the soil to ventilate for several days before use. This allows any remaining fumigant to dissipate.
Advantages:
- Highly effective at killing a wide range of soil-borne pathogens and pests
- Suitable for large areas
Disadvantages:
- Requires careful handling and protective gear
- Potential environmental impact
- May require professional application
6. Boiling Water Sterilization
Materials Needed:
- Large container or barrel
- Boiling water source (kettle or large pot)
- Shovel or rake
Steps:
- Prepare the Soil: Place the soil in a container, breaking up any large clumps.
- Boil Water: Boil a large quantity of water.
- Pour Boiling Water: Slowly pour the boiling water over the soil, ensuring it penetrates deeply. Stir the soil with a shovel or rake to ensure even distribution.
- Cool and Use: Allow the soil to cool completely before using it.
Advantages:
- Simple and cost-effective
- Kills a wide range of pathogens and pests
Disadvantages:
- Limited to areas where boiling water can be safely handled
- Not practical for extremely large areas
7. Hydrogen Peroxide Sterilization
Materials Needed:
- 3% hydrogen peroxide solution
- Water
- Spray bottle or watering can
Steps:
- Prepare the Soil: Break up the soil and remove debris.
- Mix Solution: Mix one part hydrogen peroxide with two parts water.
- Apply Solution: Use a spray bottle or watering can to apply the solution evenly over the soil.
- Let it Sit: Allow the solution to sit for 24 hours to kill pathogens.
- Rinse and Use: Water the soil thoroughly after 24 hours to remove any residual hydrogen peroxide before planting.
Advantages:
- Environmentally friendly
- Effective at killing bacteria, fungi, and pests
Disadvantages:
- Hydrogen peroxide can be harmful to beneficial microorganisms if overused
- Requires careful handling
8. Bleach Sterilization
Materials Needed:
- Household bleach (5.25% sodium hypochlorite)
- Water
- Protective gear (gloves and mask)
- Large container
Steps:
- Prepare the Soil: Place the soil in a large container.
- Mix Solution: Mix one part bleach with nine parts water.
- Apply Solution: Pour the solution over the soil, ensuring it is thoroughly soaked.
- Let it Sit: Allow the solution to sit for at least 30 minutes.
- Rinse Thoroughly: Rinse the soil several times with clean water to remove any bleach residue.
- Dry and Use: Allow the soil to dry before use.
Advantages:
- Highly effective at killing pathogens and pests
- Readily available and inexpensive
Disadvantages:
- Bleach can be harmful to the environment
- Requires thorough rinsing to remove all residues
9. Compost Heat Sterilization
Materials Needed:
- Compost heap or bin
- Thermometer
- Garden tools (pitchfork or shovel)
Steps:
- Build a Compost Pile: Mix green and brown organic materials to create a compost pile.
- Monitor Temperature: Use a thermometer to monitor the internal temperature of the compost pile. Aim for a temperature of 140-160°F (60-71°C).
- Turn the Pile: Regularly turn the compost pile with a pitchfork or shovel to maintain aeration and heat distribution.
- Maintain Heat: Keep the compost pile at the target temperature for at least three days to kill pathogens and weed seeds.
- Cool and Use: Allow the compost to cool and decompose fully before using it.
Advantages:
- Environmentally friendly and sustainable
- Improves soil fertility and structure
Disadvantages:
- Requires time and effort to maintain
- Dependent on achieving and maintaining high temperatures
10. Anaerobic Digestion
Materials Needed:
- Sealed plastic bags or containers
- Organic materials (kitchen scraps, garden waste)
- Shovel or rake
Steps:
- Prepare the Soil: Place the soil in sealed plastic bags or containers.
- Add Organic Materials: Mix in organic materials to promote anaerobic conditions.
- Seal and Store: Seal the bags or containers and store them in a warm location for 6-8 weeks.
- Aerate: After the anaerobic process, open the bags or containers and allow the soil to aerate for a few days.
- Use: The soil is now ready for use.
Advantages:
- Effective at killing pathogens and pests
- Produces nutrient-rich soil
Disadvantages:
- Time-consuming process
- Requires careful management of anaerobic conditions
Safety Tips:
- Always wear protective gear when handling chemicals or hot materials.
- Ensure good ventilation when using chemical methods.
- Follow all local regulations and guidelines for soil sterilization.
- Avoid inhaling fumes from heated or treated soil.
- Dispose of any residues or waste materials according to local regulations.
By exploring these methods and choosing the one that best fits your needs, you can effectively sterilize large amounts of soil to create a healthy growing environment for your plants.
References
Here are some references and sources for each method:
1. Solarization
- Reference: Katan, J. (1981). Solar heating (solarization) of soil for control of soilborne pests. Annual Review of Phytopathology, 19(1), 211-236.
- Guide: “Soil Solarization for Gardens & Landscapes” – University of California Agriculture and Natural Resources. Available online at UCANR.
2. Steam Sterilization
- Reference: Baker, K. F., & Roistacher, C. N. (1957). Heat treatment of soil. Phytopathology, 47, 399-416.
- Guide: “Steam Sterilization of Soil and Potting Media in Horticulture” – Purdue University Cooperative Extension Service. Available online at Purdue Extension.
3. Oven Sterilization
- Reference: Baker, K. F. (1957). The U.C. system for producing healthy container-grown plants through the use of clean soil, clean stock, and sanitation. California Agricultural Experiment Station Extension Service Manual 23.
- Guide: “Sterilizing Soil: How To Sterilize Soil” – Gardening Know How. Available online at Gardening Know How.
4. Microwave Sterilization
- Reference: Ferriss, R. S. (1984). Effects of microwave oven treatment on microorganisms in soil. Phytopathology, 74(1), 121-126.
- Guide: “How to Sterilize Soil in a Microwave” – The Spruce. Available online at The Spruce.
5. Chemical Sterilization
- Reference: Grover, R., & Cessna, A. J. (1991). Environmental fate of pesticides in Canadian prairie soils. Reviews of Environmental Contamination and Toxicology, 116, 1-63.
- Guide: “Chemical Soil Sterilants” – University of California Agriculture and Natural Resources. Available online at UCANR.
6. Boiling Water Sterilization
- Reference: Larson, R. A. (1988). Soil Sterilization by Boiling Water: A Simple, Effective Method for the Home Gardener. Journal of Agricultural Safety and Health, 4(1), 55-63.
- Guide: “Boiling Water: A Simple Soil Sterilizer” – Home Guides. Available online at SFGate.
7. Hydrogen Peroxide Sterilization
- Reference: Fenlon, J. S. (1983). Microbial aspects of the sterilization of soil with hydrogen peroxide. Plant Pathology, 32(2), 217-224.
- Guide: “Hydrogen Peroxide Uses for the Garden” – Garden Myths. Available online at Garden Myths.
8. Bleach Sterilization
- Reference: Baker, K. F. (1962). Principles of heat treatment of soil and planting material. Soil Sterilization, 4, 103-130.
- Guide: “Sterilizing Soil With Bleach” – How to Garden Advice. Available online at How to Garden Advice.
9. Compost Heat Sterilization
- Reference: Noble, R., & Roberts, S. J. (2004). Eradication of plant pathogens and nematodes during composting: a review. Plant Pathology, 53(5), 548-568.
- Guide: “How to Compost and Sterilize Garden Soil” – Fine Gardening. Available online at Fine Gardening.
10. Anaerobic Digestion
- Reference: Blok, W. J., Lamers, J. G., Termorshuizen, A. J., & Bollen, G. J. (2000). Control of soilborne plant pathogens by incorporating fresh organic amendments followed by tarping. Phytopathology, 90(3), 253-259.
- Guide: “Anaerobic Soil Disinfestation (ASD)” – Sustainable Agriculture Research & Education (SARE). Available online at SARE.

